Using AI in CODED FLOWS
AI to Generate Bricks
When the standard library of Bricks doesn't cover a specific processing need for your workflow, CODED FLOWS empowers you to leverage Artificial Intelligence to generate custom Bricks simply by describing them.
Configuring AI Providers
To leverage the AI Brick generation feature, you need to configure your preferred Artificial Intelligence provider by adding your API key and selecting the corresponding model within the CODED FLOWS settings.
Access Settings
Navigate to the AI Configuration panel from the AI menu located at the start of the sidebar.
From the Provider dropdown menu, select an LLM provider (e.g. OpenAI, Grok, Google, etc.), then enter the corresponding API key. You can repeat this step to add multiple providers, each with its own API key. Once a key is validated, the models exposed by that provider become available in the application.
Select the default AI models to use for each core task:
- Brick creation
- UI generation
- Debugging
Each task can use a different model, depending on your preferences and the models available from the configured providers.

Get API Key for OpenAI
- Go to the OpenAI developer platform: https://platform.openai.com/.
- Log in or sign up for an account.
- Navigate to the "API keys" section (usually found under your profile or in the sidebar).
- Click "Create new secret key."
- Give your key a name and click "Create secret key."
- Crucially, copy the key immediately. You will not be able to view it again after closing the modal. Store it securely.
Get API Key for Anthropic
- Go to the Anthropic console: https://console.anthropic.com/.
- Log in or sign up for an account.
- Click on your profile icon in the top right corner and select "API Keys."
- Click the "Create Key" button.
- Enter a name for your key and click "Create Key."
- Copy your key and store it in a safe place. You will not be able to view it again once you leave the page.
Get API Key for Mistral AI
- Go to the Mistral AI console: https://console.mistral.ai/.
- Log in or sign up for an account.
- Navigate to the "API Keys" section (usually in the sidebar under "API").
- Click "Create new key."
- Optionally, give your key a name and set an expiration date.
- Click "Create key."
- Copy the generated key immediately as it will not be shown again. Store it securely.
Get API Key for DeepSeek
- Go to the DeepSeek Open Platform: https://platform.deepseek.com/.
- Log in or sign up for an account. You might be able to use a Google account to log in.
- Click on "API keys" in the left-hand sidebar.
- Click "Create new key."
- Give it a name and click "Create API key."
- Copy your API key. It will only be visible at the time of creation. Store it securely.
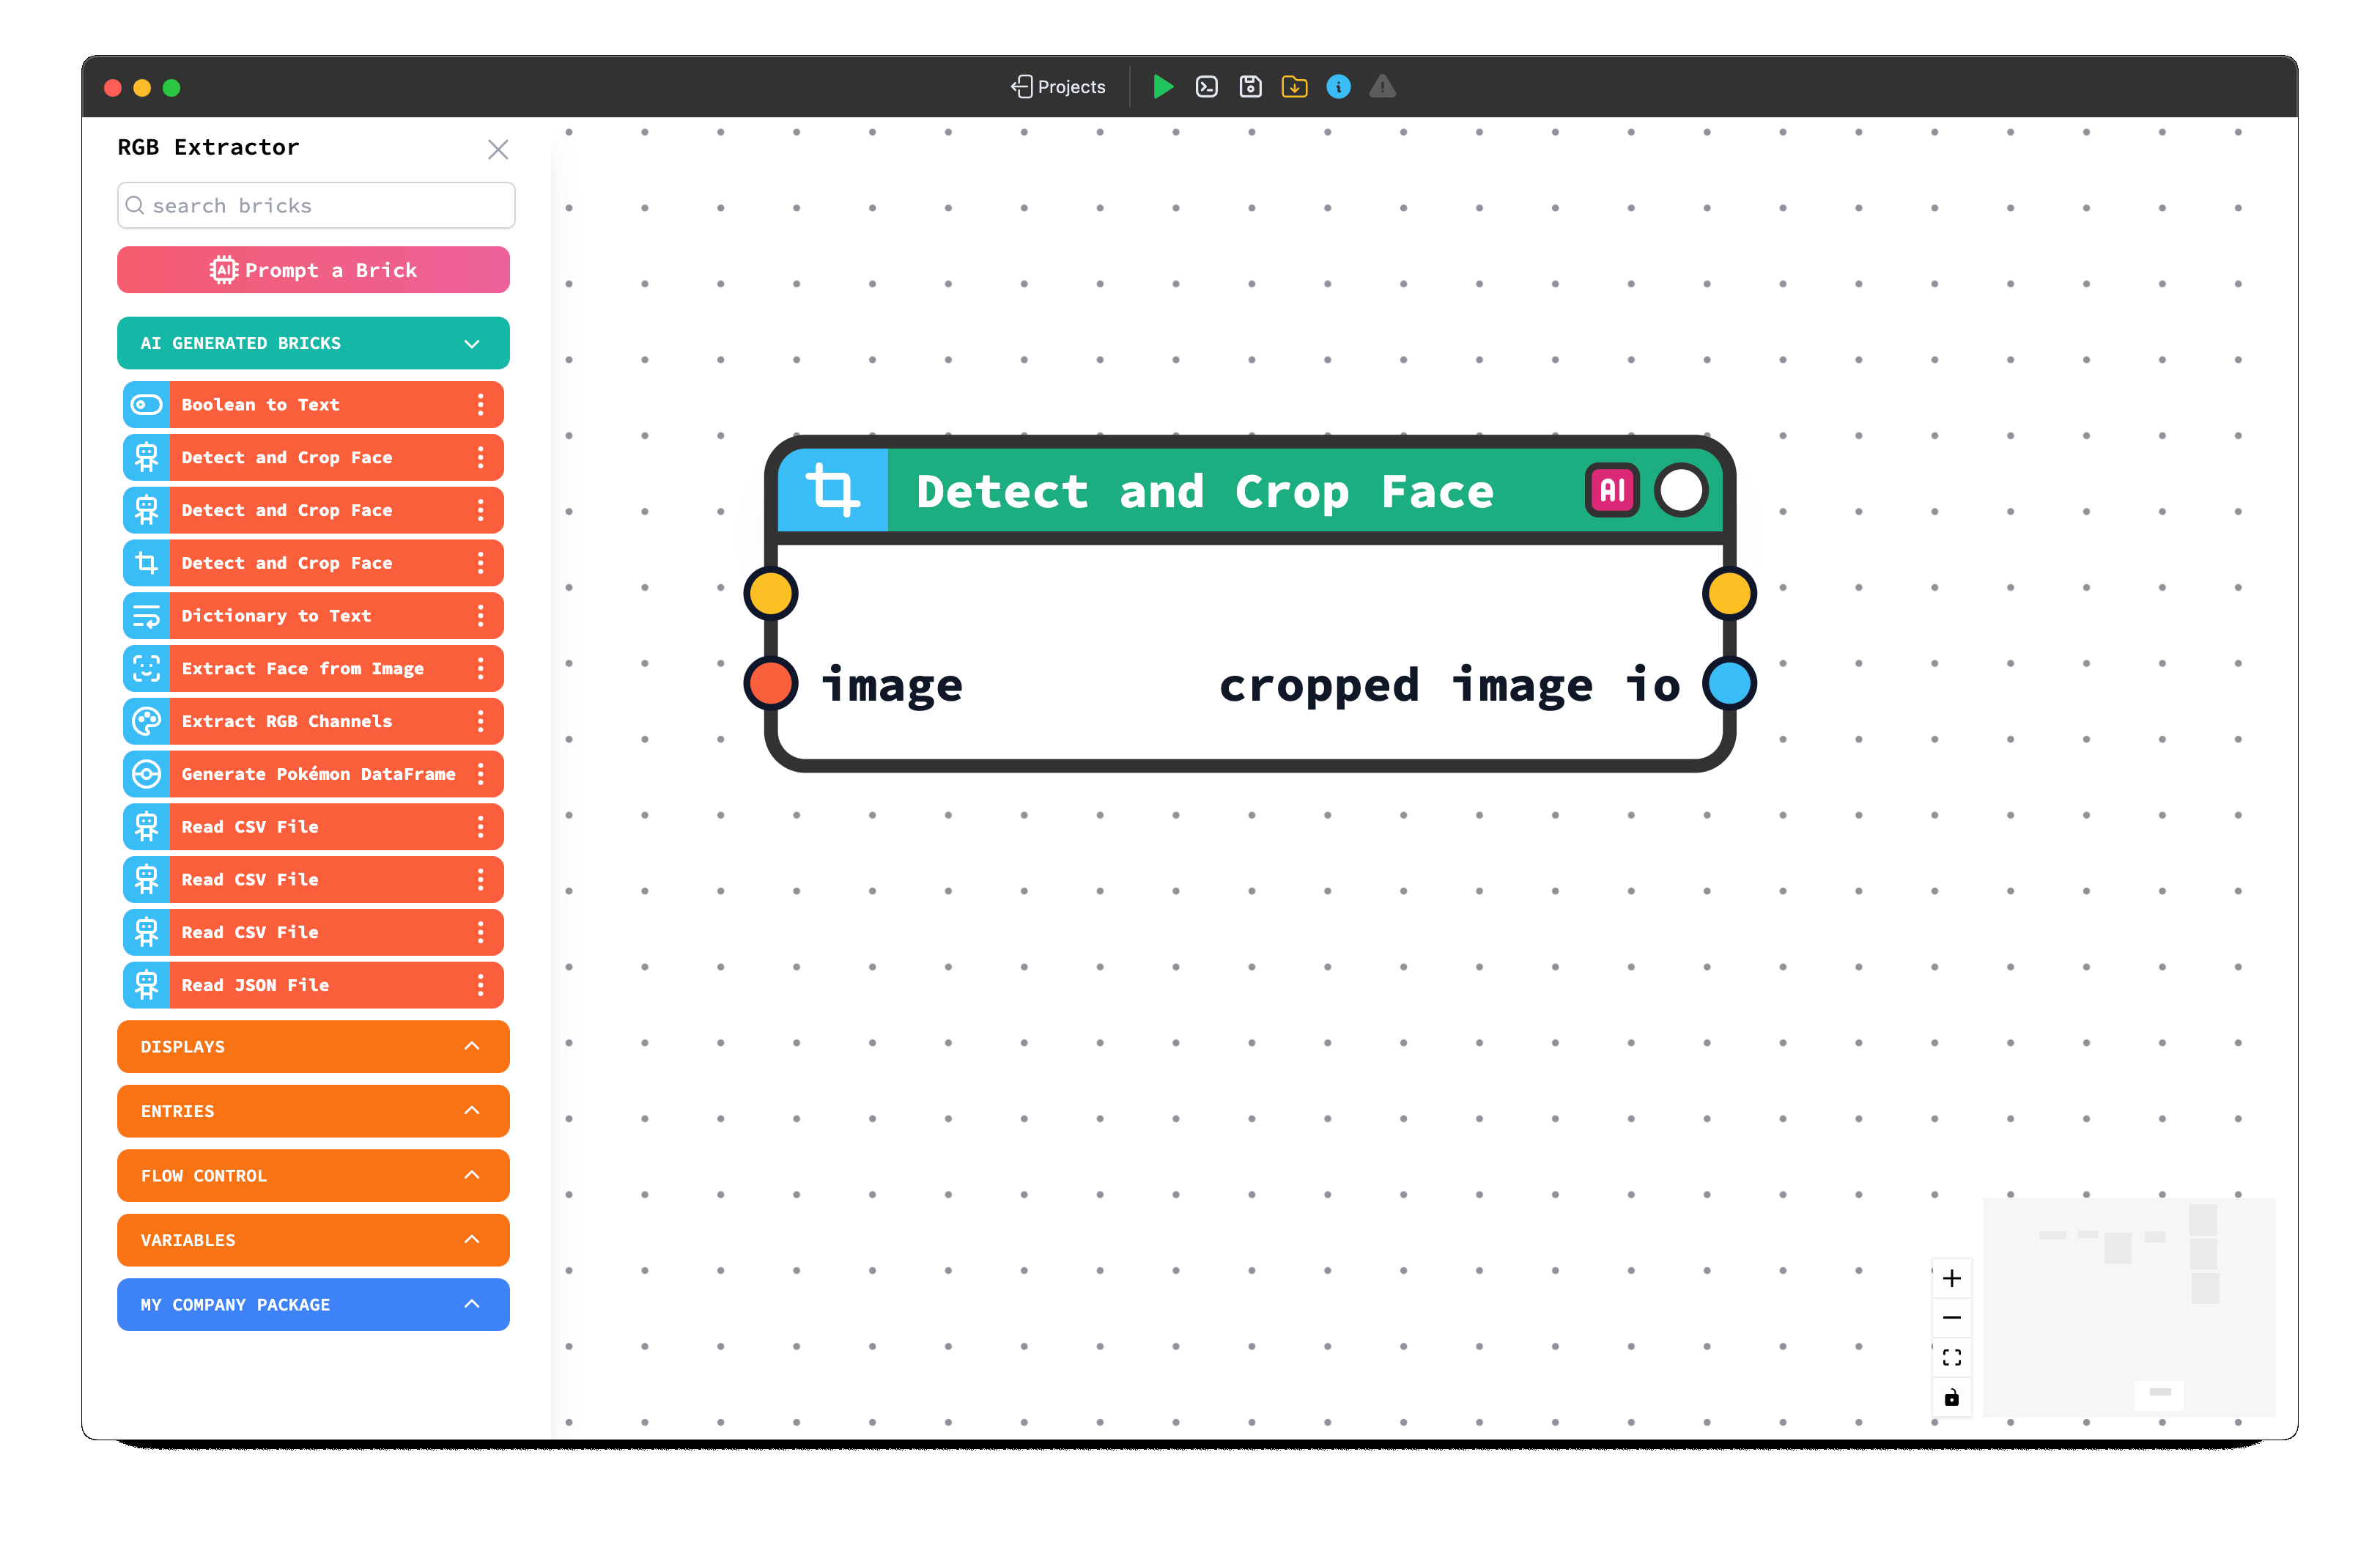
Generating Bricks
Once you have entered your API key and selected your model in the CODED FLOWS settings, the AI Brick generation feature will be enabled and ready for use as described in the previous sections.
Step 1: Initiate the Prompt
- Navigate to your project's graph interface.
- Locate the
Prompt a Brickbutton, typically positioned at the top of the sidebar containing the Brick library. - Click this button.

- This action will open the AI Brick generation prompt modal.
Step 2: Define Your Brick
The prompt modal is where you describe the Brick you want the AI to create. Provide clear and detailed information for the best results:

Brick Main Processing:
- Describe the core functionality. What task should this Brick perform? Be specific about the process (e.g., "Read a CSV file, filter rows where column 'A' is greater than 10, and output the filtered data").
Inputs:
- Define each input the Brick requires. For every input, specify:
- Description: A clear name or label (e.g., "Input File Path", "Threshold Value").
- Type: The expected data type (e.g.,
string,integer,float,list,dataframe).
- Define each input the Brick requires. For every input, specify:
Outputs:
- Define each output the Brick will produce. For every output, specify:
- Description: A clear name or label (e.g., "Filtered Data", "Row Count").
- Type: The data type of the result (e.g.,
dataframe,integer).
- Define each output the Brick will produce. For every output, specify:
Options (Contextual Menu):
- Describe any parameters that should be configurable when a user clicks the "Options" button on the Brick instance in the graph. Explain what each parameter controls (e.g., "Delimiter: Specify the character used to separate columns in the CSV, defaults to comma").
Once you have filled in all the necessary details, click the
Generatebutton. Your default model is automatically selected, but you can switch to another available model if needed before generating your Brick.
Generation Time
Generating a Brick via AI may feel slower compared to typical AI chat responses. This is because CODED FLOWS must wait for the AI to generate the complete, structured underlying code before it can translate that code into a functional, visual Brick node for your graph. Patience during this step ensures a properly constructed Brick.
Step 3: Using Your AI-Generated Brick
- Once the generation is complete, the new Brick will appear.
- You can now drag, drop, and connect this AI-generated Brick within your workflow exactly like any standard Brick.
Step 4: Modifying and Iterating
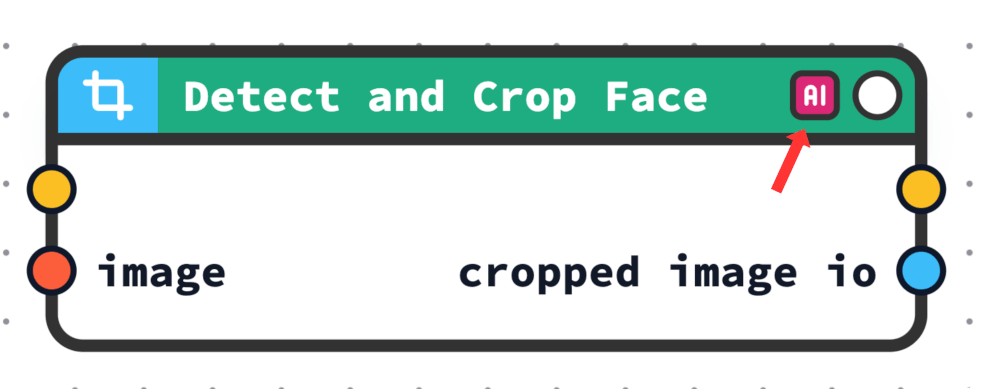
- AI-generated Bricks have an additional button, with the AI icon, compared to standard Bricks.
- Clicking this button re-opens the prompt modal, pre-filled with the original prompts used to generate that specific Brick.
- You can use this feature to:
- Review the original requirements.
- Modify the prompts to refine the Brick's behavior, inputs, outputs, or options.
- Click
Generateagain to create a new Brick based on your updated description. This allows for iterative improvement.
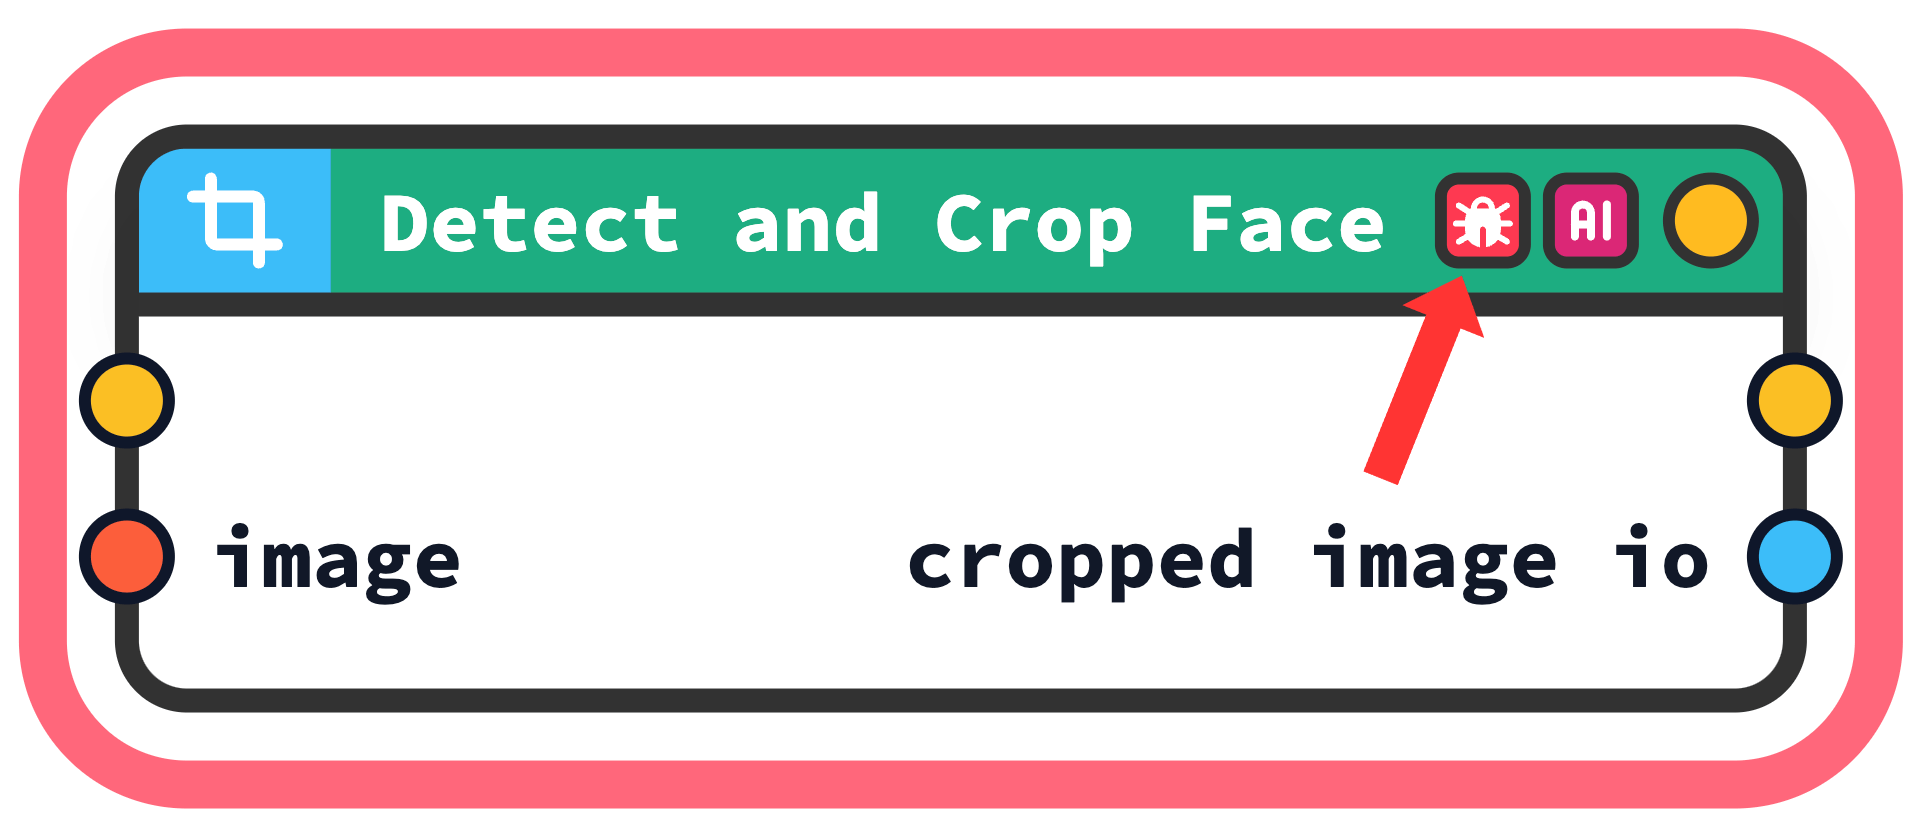
Step 5: Debugging Errors
- Should an error occur when running an AI-generated Brick, a distinct
Debugbutton will appear on the Brick node itself within the graph. - Clicking this
Debugbutton sends a request to the AI, asking it to analyze the error context and attempt to automatically correct the underlying Python script associated with the Brick.
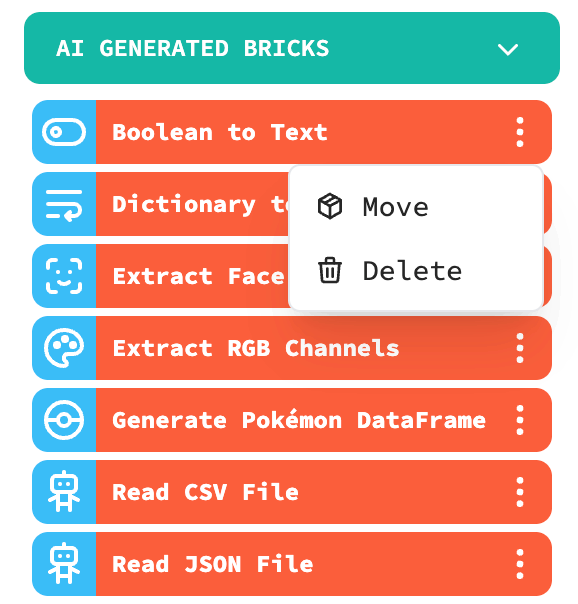
Step 6: Organizing AI Bricks
- Default Location: All Bricks generated using this AI feature are automatically placed in a dedicated package named
AI Generated Bricks. You can find this package listed in the sidebar along with other Brick packages. - Virtual Packages: For better organization based on themes or functionality, you can create "virtual packages" via the main
Packagesmenu in the application. - Moving Bricks: To move an AI-generated Brick to a virtual package you've created:
- Locate the specific AI-generated Brick in the sidebar list (under
AI Generated Bricks). - Click the contextual menu button (often represented by three dots) next to the Brick's name.
- Select the
Moveoption from the menu. - Choose the desired destination virtual package from the subsequent list or dropdown.
- Locate the specific AI-generated Brick in the sidebar list (under
This AI generation capability provides a powerful way to extend CODED FLOWS' functionality and tailor it precisely to your unique data processing needs.